

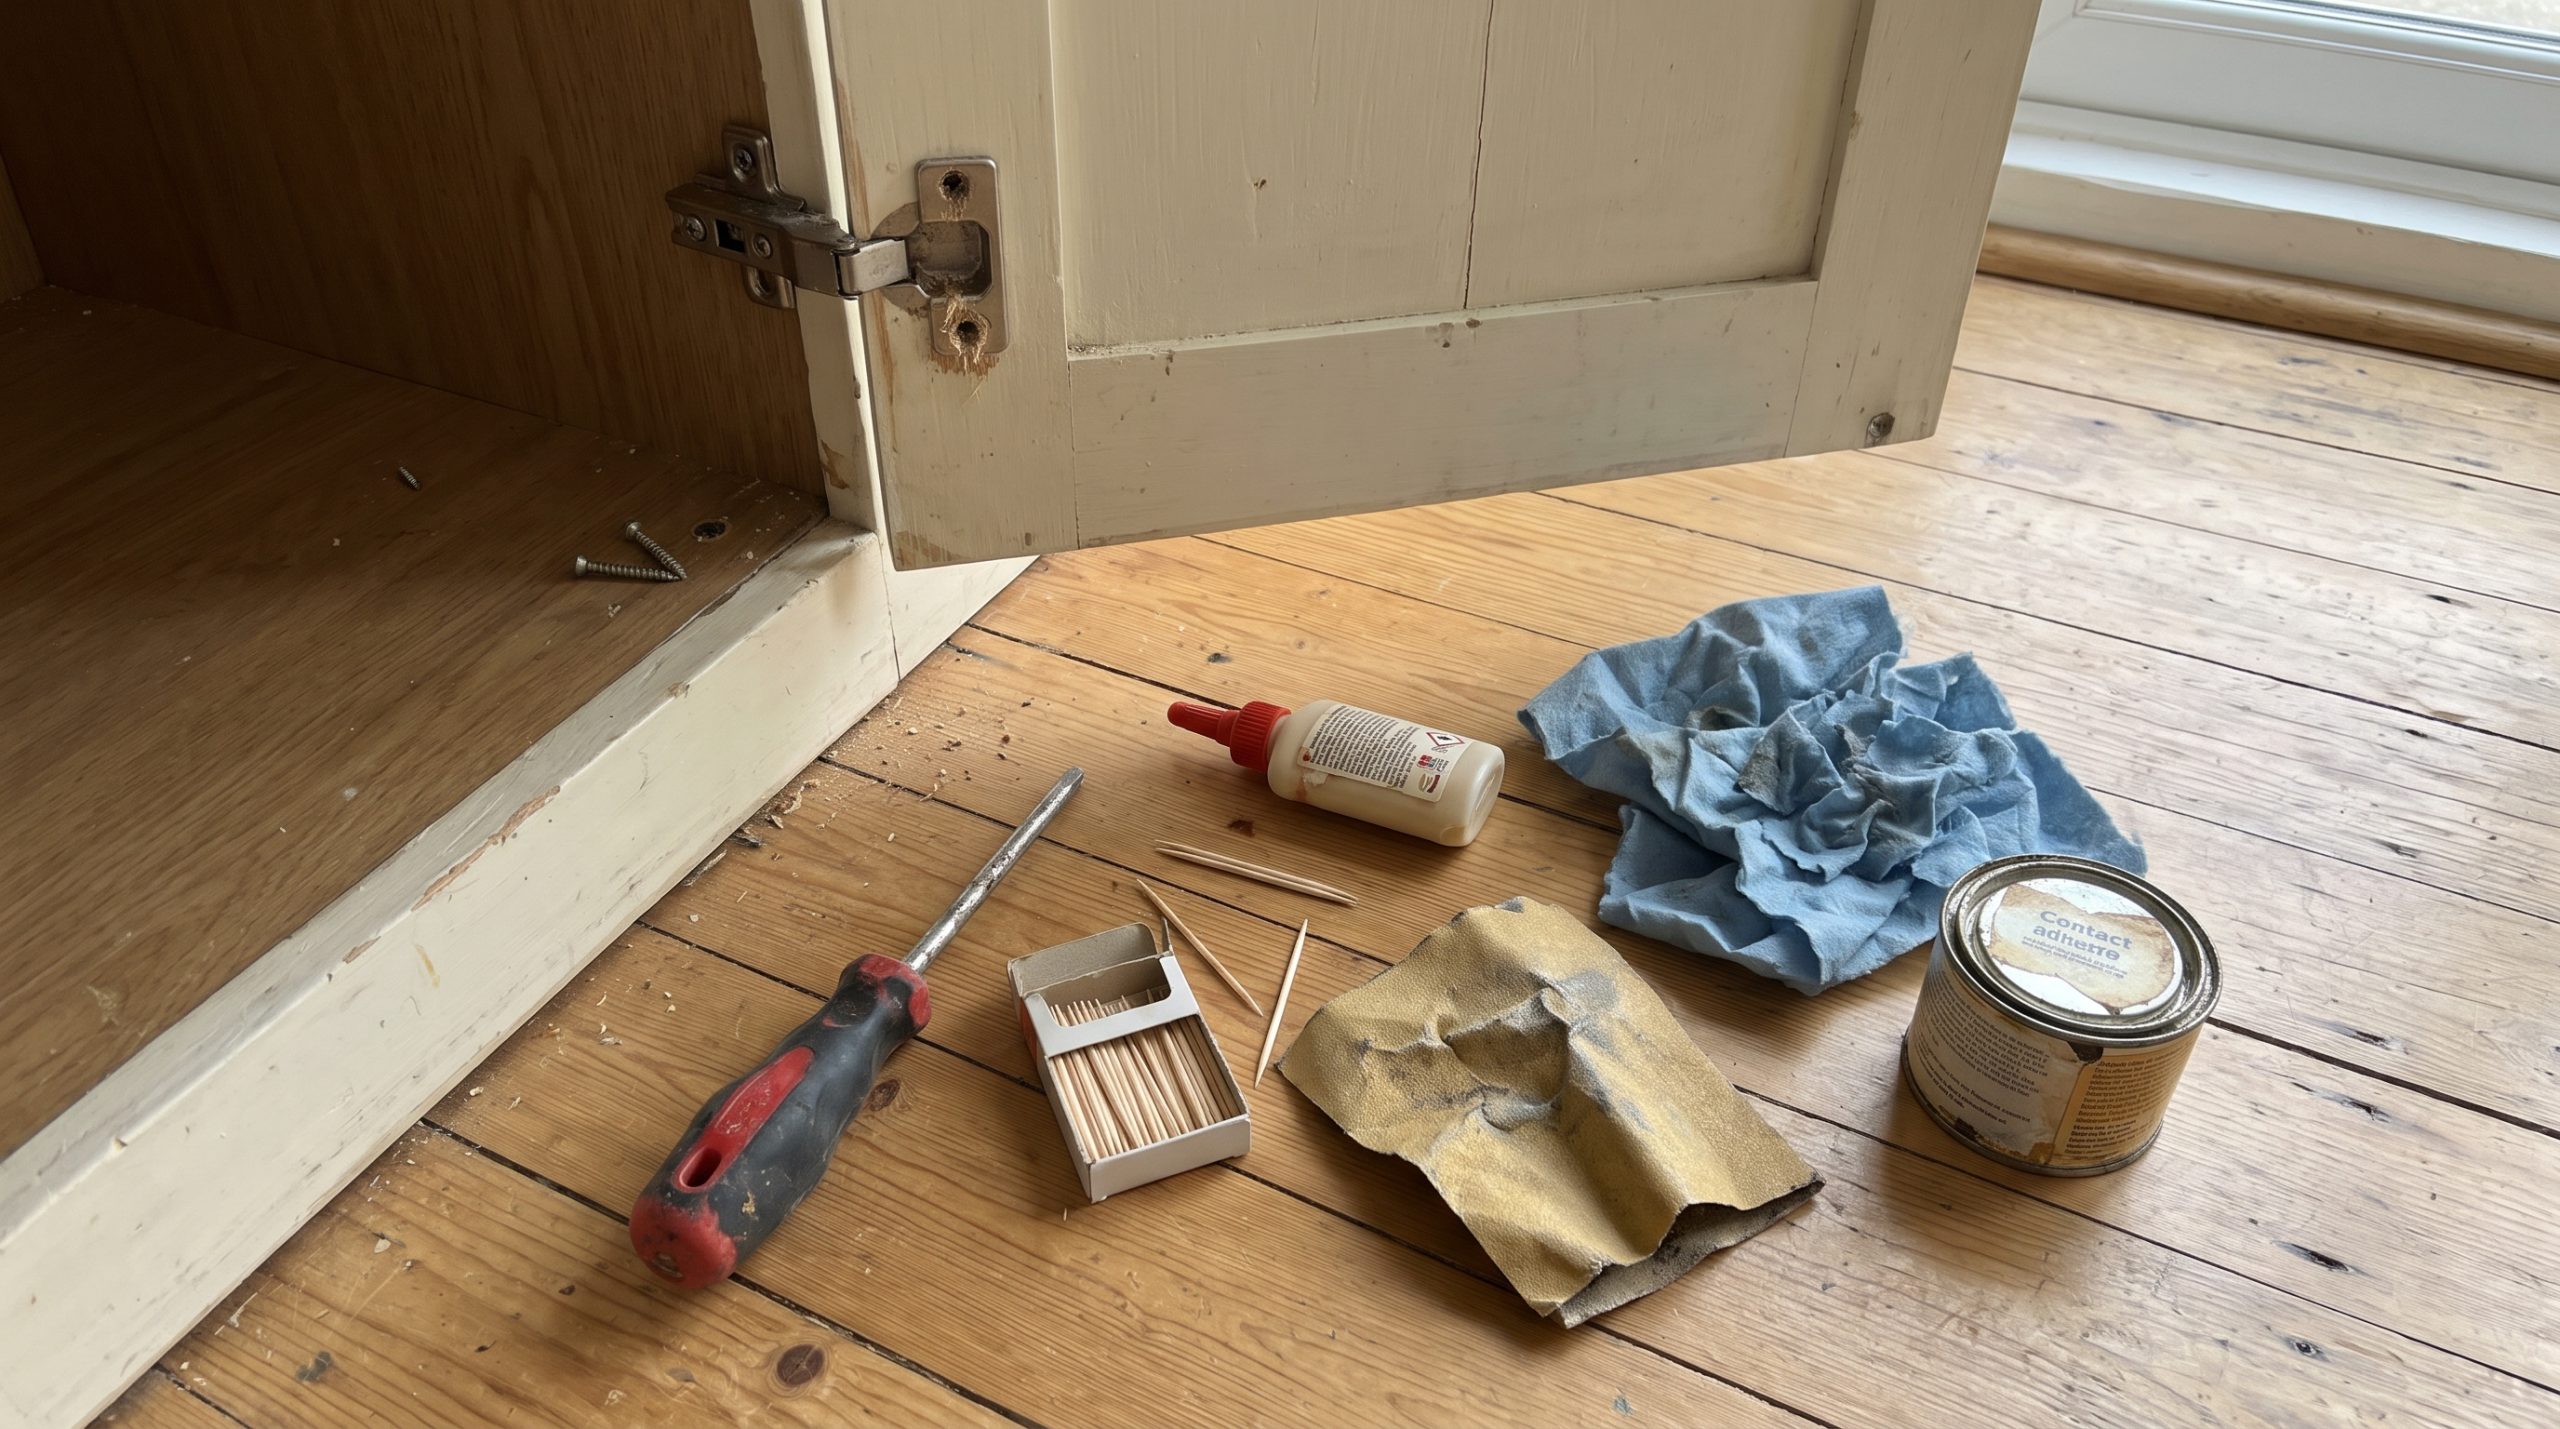
A loose hinge, a sagging shelf or a peeling corner does not mean your furniture is finished. In most homes, the damage is small and can be repaired in under an hour with tools you already own. The danger is waiting. A slightly loose hinge becomes a cracked door, a small peeling edge becomes a swollen panel, and a minor stain becomes a replacement job. This guide shows you how to fix plywood furniture problems at home, step by step, and tells you honestly when it is time to call a carpenter instead.
Basic Tools You Will Need
You do not need a full workshop. Most repairs use these.
- Screwdrivers (flat and Phillips) and a small drill
- Wood glue and contact adhesive
- Fine sandpaper (180 to 240 grit)
- A clean cloth, a small brush and masking tape
- Wooden toothpicks or matchsticks for stripped holes
- Clamps, or heavy books and tape as a substitute
- PU varnish or edge sealer and a few spare screws
Always start by emptying the furniture and moving it to a place where you can work comfortably. Check what caused the problem before repairing it, or it will come back.
Problem 1: Sagging Shelves
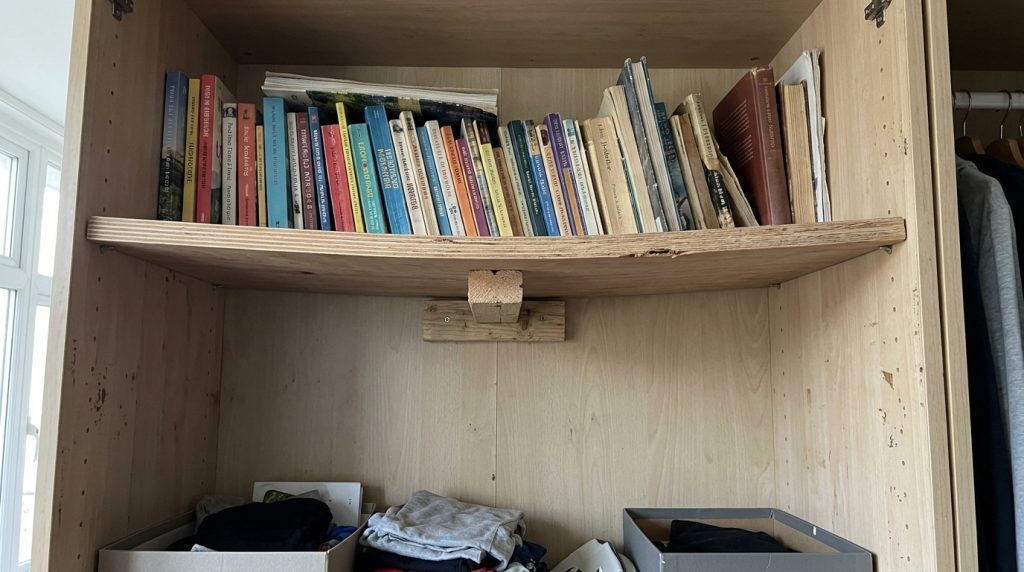
Why it happens: Shelves sag when they carry too much weight over too long a span, or when the plywood is too thin for the job. Heavy books, kitchen jars and stored files are common causes. We look at safe limits in our guide to load and placement for plywood furniture.
How to fix it:
- Remove everything from the shelf and flip it over if it can be reversed, since sagging often goes in one direction.
- Add a support in the middle. A small wooden cleat or vertical divider under the centre stops the bend.
- Add a strip of solid wood or plywood glued and screwed along the front or back edge, which stiffens the shelf like a beam.
- Redistribute the load: heavy items near the ends or sides, light items in the middle.
If the shelf is badly bowed or cracked, replace it with a thicker board.
Problem 2: Loose Hinges and Stripped Screw Holes
Why it happens: Plywood holds screws well on its face, but screws placed close to an edge, or screwed in and out many times, can strip the hole. Heavy doors make it worse.
How to fix it:
- Open the door and remove the loose screws.
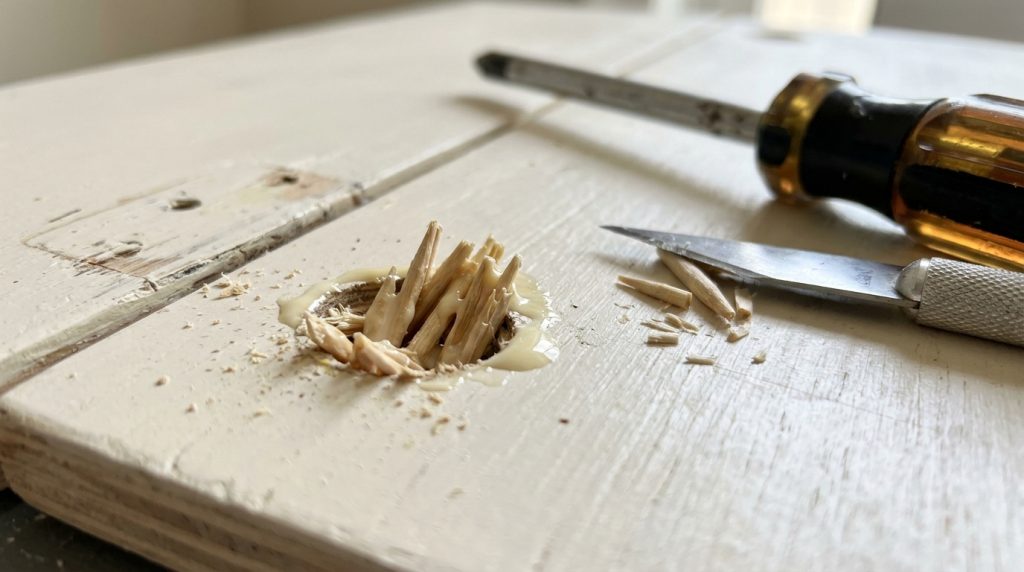
- Dip toothpicks or matchsticks in wood glue, push several into the hole until it is full, and snap them off flush.
- Let the glue dry for about an hour, then trim the tops with a blade.
- Re-drill a small pilot hole and refit the hinge with the original screw, or a slightly longer one if the panel is thick enough. Do not use a screw that could go through the other face.
- Tighten gently. Over-tightening strips the hole again.
If the hole is close to the edge, move the hinge slightly or fit a small backing strip to give the screw more wood to hold.
Problem 3: Peeling or Lifting Laminate
Why it happens: Moisture, heat or old glue failure causes laminate to lift, especially at corners and edges. Hot pans, steam from kettles and wet mopping are common causes.
How to fix it:
- Clean under the lifted area with a dry cloth and remove old glue lumps with a blade.
- Let the plywood dry completely. Glueing over damp wood fails.
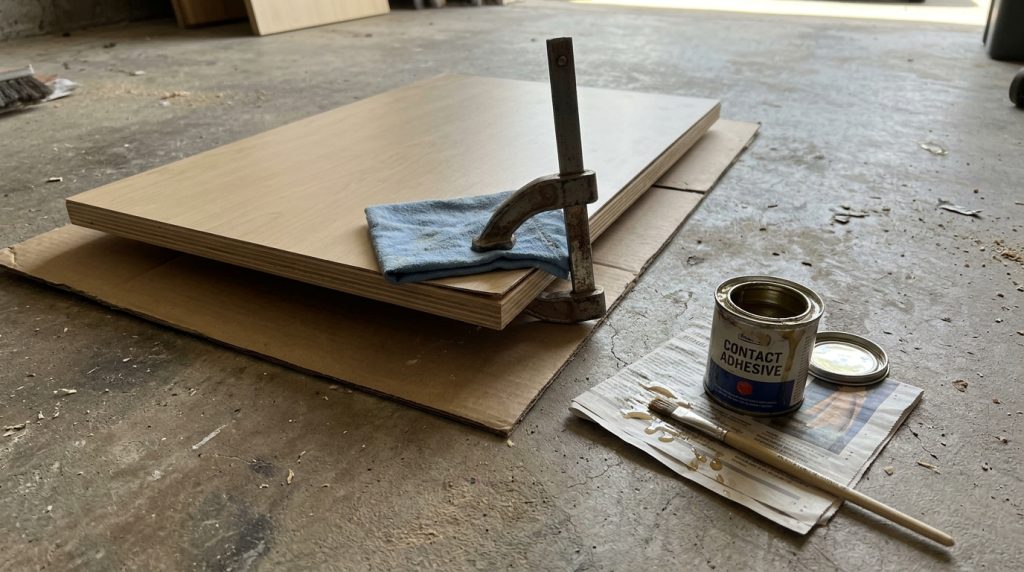
- Apply contact adhesive thinly to both the plywood and the back of the laminate, following the instructions on the can.
- Wait until the glue turns tacky, then press the laminate down firmly from the centre outwards.
- Hold it with clamps or tape and heavy books for several hours.
- Seal the edge with edge band or varnish, using the steps in our guide to seal plywood edges.
If a large area has lifted, or the plywood beneath is soft and swollen, the repair will not last. Call a carpenter.
Problem 4: Water Stains and Dark Marks
Why it happens: Spills, wet cups and leaks leave rings and dark patches. On veneer, water can lift the finish and discolour the wood underneath.
How to fix it:
- Wipe the area and let it dry completely.
- For light rings on veneer, rub gently with a soft cloth and a little furniture polish.
- For deeper stains, sand very lightly along the grain with fine paper, then wipe off dust.
- Apply a matching varnish or wax in thin coats to blend the area.
For laminate, a stain usually sits on top and wipes off. If it is dark under the surface, water has probably entered, and the panel needs inspection.
Problem 5: Swollen Edges and Panels
Why it happens: Unsealed edges absorb moisture, causing the layers to swell. This is the most common monsoon problem in plywood furniture.
How to fix it:
- Find and fix the source of dampness first.
- Move the furniture to a dry, ventilated place and let it dry for several days. Do not use a heater or hair dryer directly on the surface.
- Once dry, sand the raised edge gently until it is level.
- Fill any gaps with wood filler, sand smooth and apply two or three coats of PU varnish or fresh edge banding.
- Raise the furniture off the floor and leave a gap from the wall, as explained in our guide to protecting plywood furniture from moisture.
Light swelling often settles after drying and sealing. If the panel is thick with swelling, crumbling or soft in the middle, replace it.
Problem 6: Sticking Doors and Drawers
Why it happens: Humidity makes panels expand slightly, loose hinges let doors drop, or the cabinet itself is slightly out of level.
How to fix it:
- Check the floor level and adjust feet or add thin packing under the base.
- Tighten hinge screws and adjust hinge screws if your hinges allow it.
- Rub a little candle wax or soap on drawer runners.
- If a door still catches, mark the sticking edge, sand it lightly and re seal the bare edge.
When to Call a Carpenter
Do it yourself repairs suit small problems. Call a professional when you see:
- Large areas of swelling, soft spots or crumbling plywood
- Signs of termites or borers, such as frass, mud tubes or pinholes (see our guide to protecting plywood furniture from termites)
- Cracks running through structural panels
- Doors that will not stay aligned even after tightening
- Anything involving load bearing parts, such as bed frames and wall mounted units
A quick call early costs less than rebuilding the whole piece later.
Quick Decision Box
| Problem | Quick fix | Call a carpenter if… |
|---|---|---|
| Sagging shelf | Add a centre support or stiffening strip | The shelf is cracked or badly bowed |
| Loose hinge | Fill hole with glued toothpicks, re drill | The panel edge itself is crumbling |
| Peeling laminate | Re glue with contact adhesive, seal edge | A large area has lifted or the board is soft |
| Swollen edge | Dry, sand, fill, seal | The swelling goes deep into the panel |
| Sticking drawer | Level the unit, wax runners | The frame is twisted |
A Note on Nepal’s Climate
In the Terai, expect more peeling and swelling after the monsoon, so plan an inspection and small repairs each September or October. In the hills and Kathmandu Valley, dry winters can cause small gaps at joints and make old glue brittle, so check hinges and corners in spring. Wherever you live, spotting problems early is the cheapest repair strategy.
Frequently Asked Questions
Can I repair swollen plywood permanently? Light swelling can be repaired if the board dries fully and is sealed. Heavily damaged boards should be replaced.
What glue should I use? Use wood glue for joints and holes, and contact adhesive for laminate and veneer.
How tight should I fit screws? Firm, not forced. Over-tightening damages the plywood.
A Solid Base Means Fewer Repairs: Garjanwood by CenturyPly
The fewer problems you start with, the fewer you need to fix. Garjanwood by CenturyPly is manufactured at Century Ply Industries in Barju, Sunsari, and is IS:303 certified. Look for the pale cream Garjan grain, the red and black diagonal edge band with the Garjanwood name, and the red IS:303 stamps at the corners. Ask your carpenter to use it for shelves, doors and carcasses, and keep this repair guide handy for the occasional touch up. Learn more at centuryplynepal.com.